
confluence7.12.5安装
1、下载7.12.5
https://www.atlassian.com/zh/software/confluence/download-archives
2、安装
$ sudo ./atlassian-confluence-7.13.18-x64.bin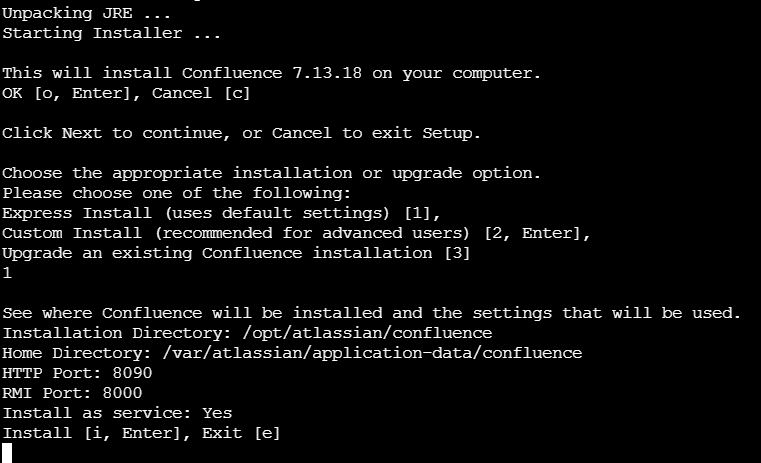
3、破解
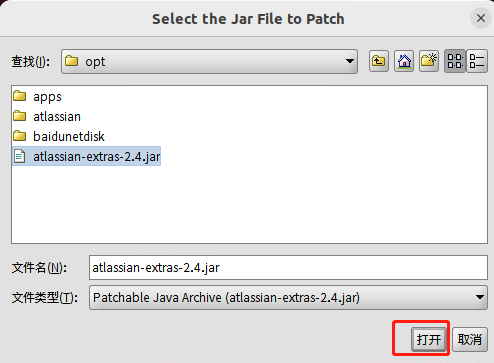
1)备份jar包
sudo mv /opt/atlassian/confluence/confluence/WEB-INF/lib/atlassian-extras-decoder-v2-3.4.1.jar /opt/atlassian/atlassian-extras-2.4.jar
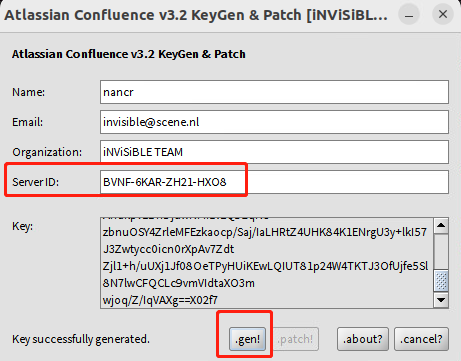
2)破解jar
破解工具:
链接:https://pan.baidu.com/s/1x-Q9_zSM1VlS3wIuBE21uw?pwd=lik6
提取码:lik6
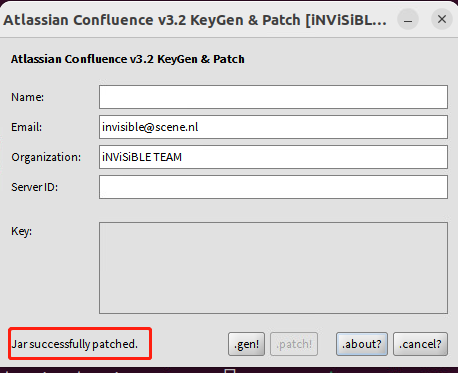
此时jar已经破解成功了,原始jar被更名为atlassian-extras-2.4.bak,破解后的jar:atlassian-extras-2.4.jar
3)将破解后的jar复制到原始目录下
sudo mv /opt/atlassian/atlassian-extras-2.4.jar /opt/atlassian/confluence/confluence/WEB-INF/lib/atlassian-extras-decoder-v2-3.4.1.jar
4)将mysql connect jar拷贝到lib目录
sudo cp /opt/atlassian/mysql-connector-java-5.1.49.jar /opt/atlassian/confluence/confluence/WEB-INF/lib/
5、重启confluence
/opt/atlassian/confluence/bin/stop-confluence.sh /opt/atlassian/confluence/bin/start-confluence.sh 或者: systemctl start confluence.service
6、访问
http://192.168.1.216:8090 或者 https://confluencencr.kooldns.cn/
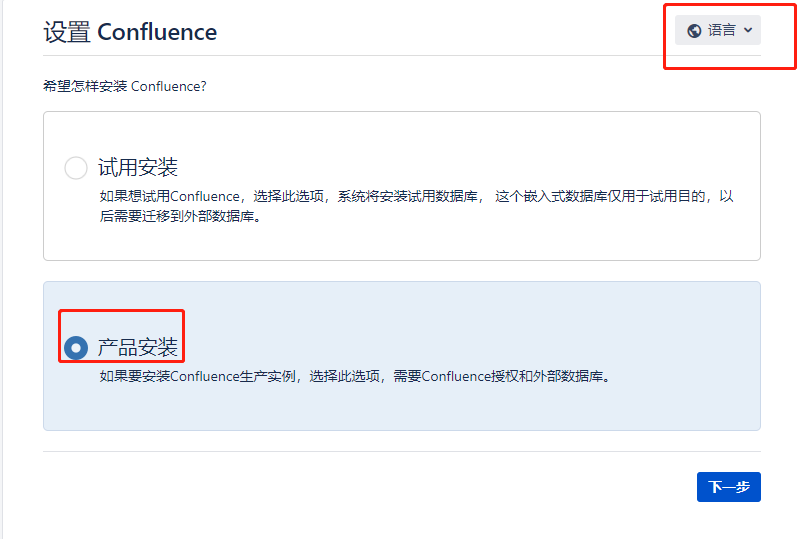
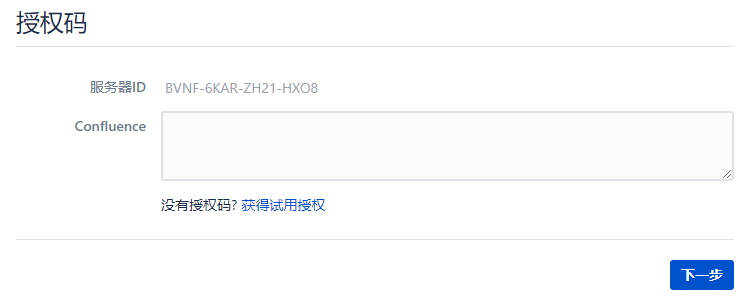
7、生成授权码
复制key到授权码中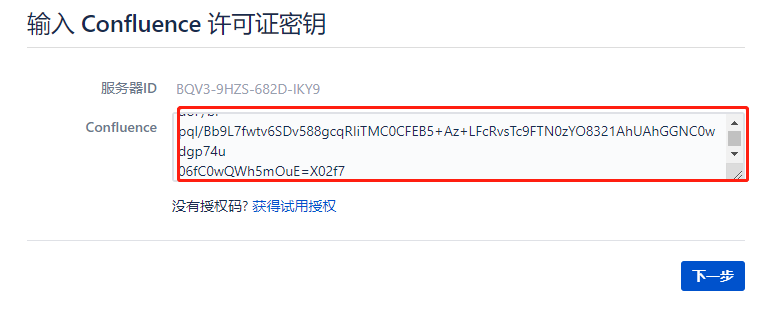
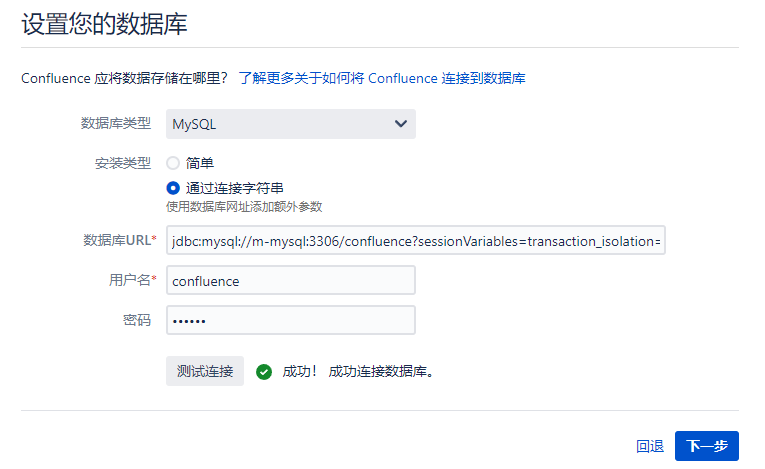
8、创建数据库
CREATE DATABASE confluence CHARACTER SET utf8mb4 COLLATE utf8mb4_bin; --ALTER DATABASE confluence CHARACTER SET utf8mb4 COLLATE utf8mb4_bin; CREATE USER 'confluence'@'%' IDENTIFIED BY '规则'; grant all privileges on confluence.* to confluence@'%' with grant option; flush privileges;
confluence的mysql链接 :必须是mysql5.7
jdbc:mysql://localhost:3306/confluence?sessionVariables=transaction_isolation='READ-COMMITTED'&useUnicode=true&characterEncoding=utf8&allowPublicKeyRetrieval=true&useSSL=false
发生如下错误:
配置数据库失败
StatementCallback; uncategorized SQLException for SQL [CREATE TRIGGER denormalised_space_trigger_on_update AFTER UPDATE ON SPACES FOR EACH ROW sp: BEGIN DECLARE isServiceDisabled BOOL DEFAULT TRUE; CALL space_procedure_for_denormalised_permissions(isServiceDisabled); IF (isServiceDisabled) THEN LEAVE sp; END IF; IF (NEW.LOWERSPACEKEY = OLD.LOWERSPACEKEY) THEN LEAVE sp; END IF; INSERT INTO DENORMALISED_SPACE_CHANGE_LOG(SPACE_ID) VALUES (NEW.SPACEID); END;]; SQL state [HY000]; error code [1419]; You do not have the SUPER privilege and binary logging is enabled (you might want to use the less safe log_bin_trust_function_creators variable); nested exception is java.sql.SQLException: You do not have the SUPER privilege and binary logging is enabled (you might want to use the less safe log_bin_trust_function_creators variable)
数据库使用的mysql8,更改为mysql5.7后正常。
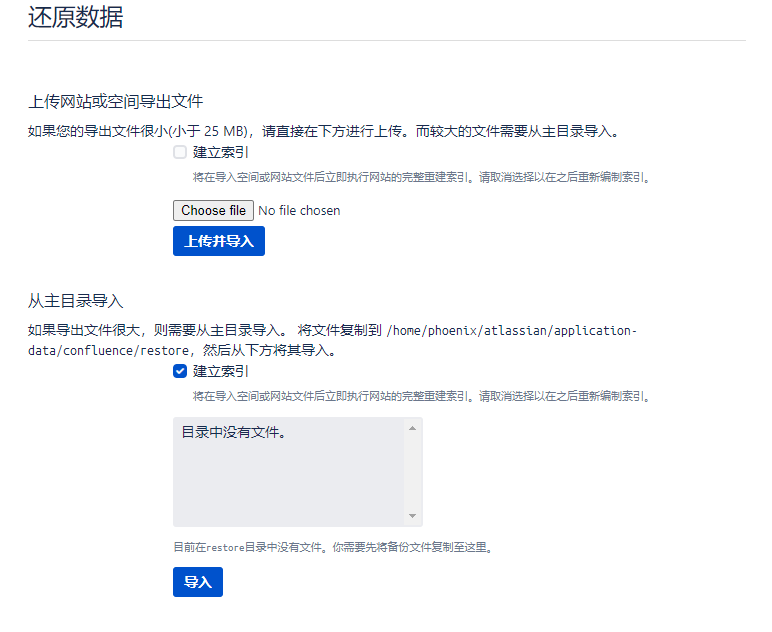
9、【可选】如果有完整备份,可以直接还原
--- 1:url不匹配
进入站点管理,修改服务器主页url
----》

问题 mcat server.xml 配置不正确:
scheme 应为 'https'
proxyName 应为 域名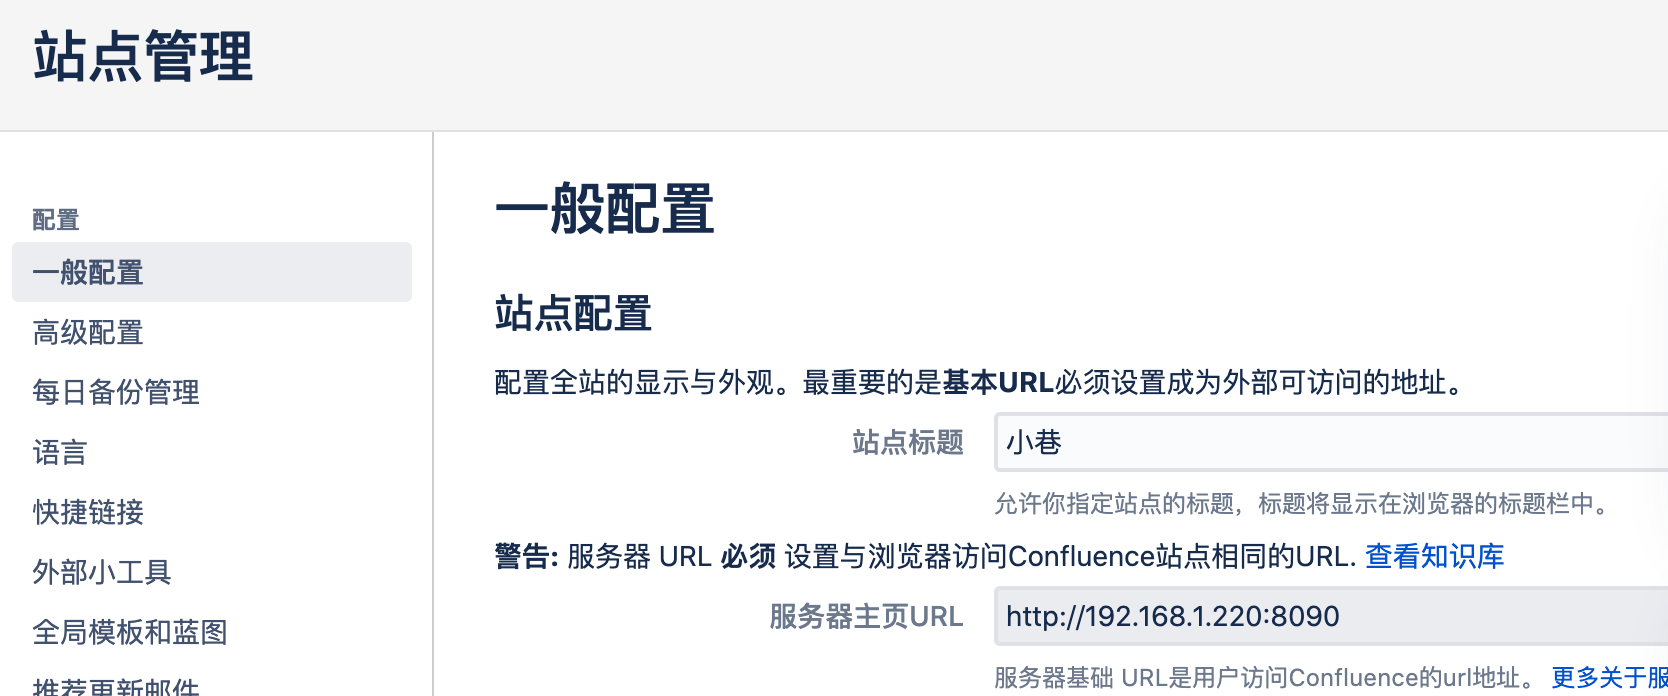 proxyPort 应为 '443'
解决:
vim /opt/atlassian/confluence/conf/server.xml
<--在原来的基础上增加配置项proxyName/proxyPort/scheme-->

<Connector port="8090" connectionTimeout="20000" redirectPort="8443" maxThreads="48" minSpareThreads="10" enableLookups="false" acceptCount="10" URIEncoding="UTF-8" protocol="org.apache.coyote.http11.Http11NioProtocol" proxyName="confluencencr.xxx.com" proxyPort="443" scheme="https"/>
问题3:在您系统中的InnoDB 日志文件大小健康检查失败了。
vim /etc/mysql/mysql.conf.d/mysqld.cnf
#####新增
innodb_log_file_size=256M
问题4:最大允许数据包
vim /etc/mysql/mysql.conf.d/mysqld.cnf
#####新增
max_allowed_packet=256M问题4:nginx配置用户认证后,反向代理confluence报错:因为当前请求缺少对目标资源对有效的认证信息,所以它不会实施。
https://serverfault.com/questions/511846/basic-auth-for-a-tomcat-app-jira-with-nginx-as-reverse-proxy
需要配置:
location / {
	proxy_pass http://localhost:8090;
	proxy_set_header   Authorization "";
}
评论